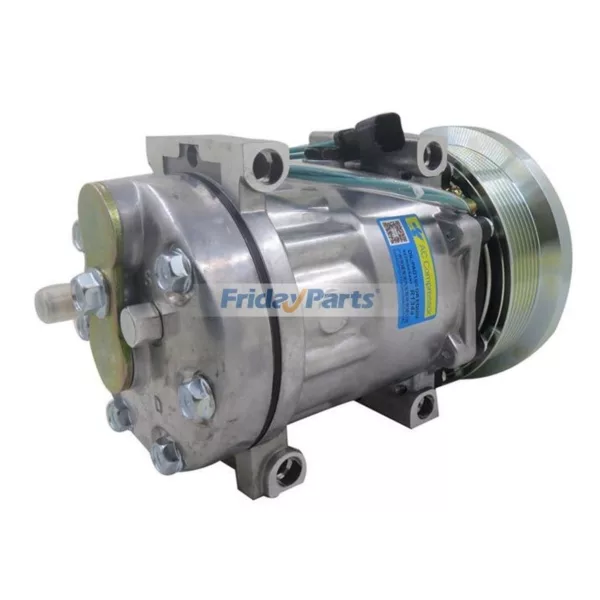
The sun is blazing, the air is thick with humidity, and the temperature is soaring. It’s the kind of day that makes you grateful for the cool breeze of an air conditioner. But what happens when your off-road machinery’s A/C compressor decides to call it quits in this sweltering weather? Fear not!
Signs Your A/C Compressor Needs Replacement
As you may wonder, what are the signs that my air conditioning compressor needs to be replaced? Common indicators include unusual noises such as grinding or squealing, a noticeable decrease in cooling performance, frequent cycling of the A/C system, or even a complete loss of cooling. Additionally, if you notice any refrigerant leaks or the compressor clutch not engaging, it’s a strong signal that the compressor may need to be replaced.
Reads: Bad Signs of A/C Compressor in Heavy Equipment During Summer
Rather than paying a lot of dollars to hire a professional to help replace the air conditioner compressor, it may be a more cost-effective option to replace it yourself. Replacing an A/C compressor might seem daunting, but with the right guidance, you can get your machinery back to a comfortable working environment in no time. Let’s dive into the step-by-step guide to replace an A/C compressor and ensure your machinery stays cool, even when the weather is anything but.

8 Steps to Replace an A/C Compressor in Off-Road Machinery
Step 1: Gather Your Tools and Materials
Before you begin, make sure you have all the necessary tools and materials. You’ll need:
- A new A/C compressor compatible with your machinery
- Wrenches and sockets
- A screwdriver set
- Refrigerant recovery machine
- Replacement O-rings and gaskets
- Refrigerant oil
- Safety goggles and gloves
Step 2: Safety First
Working on heavy machinery can be hazardous, so safety should always be your top priority. Wear safety goggles and gloves to protect yourself from any potential hazards. Ensure the machinery is turned off and the keys are removed to prevent any accidental startups.
Step 3: Recover the Refrigerant
Using a refrigerant recovery machine, safely extract the refrigerant from the system. This step is crucial to avoid releasing harmful chemicals into the atmosphere and to comply with environmental regulations. Just a warm reminder, If you are not sure about this step, remember to turn to the professionals for help. If refrigerant remains, take the car to a mechanic for proper disposal.
Step 4: Remove the Old Compressor
Have you heard of the three-step joke to stuff an elephant into a refrigerator? The first step is to open the refrigerator, the second step is to stuff the elephant in, and the third step is to close the refrigerator. Come on, we are not talking about the steps that you take for granted here.
First, how to access the compressor? Lift the car and support it with jack stands, then remove the tire and the rubber cover to access the compressor. Next, disconnect the hoses and electrical connections from the compressor, and use a serpentine belt tool to remove the belt from the pulley.
Then you can locate the A/C compressor in your machinery. It’s usually mounted near the engine. Use your wrench and socket set to disconnect the compressor from its mounting brackets. Carefully remove the electrical connectors and refrigerant lines attached to the compressor. Be prepared for some residual refrigerant to escape, so work cautiously.
Step 5: Install the New Compressor
Now we have come to the stage where we put the elephant in the refrigerator. With the old compressor out of the way, it’s time to install the new one. Begin by placing the new O-rings and gaskets on the refrigerant lines to ensure a proper seal. Attach the refrigerant lines and electrical connectors to the new compressor. When inserting the new one into place remember to secure it with the cleaned bolts. You can also use Loctite to prevent vibration-induced loosening. Secure the compressor to the mounting brackets using your wrench and socket set.
Step 6: Add Refrigerant Oil
Before you can recharge the system, you’ll need to add the appropriate amount of refrigerant oil to the new compressor. Check the manufacturer’s specifications for the correct type and amount of oil needed. Pour the oil into the compressor through the designated port.
Step 7: Recharge the System
Once the new compressor is securely installed and filled with refrigerant oil, it’s time to recharge the system with refrigerant. Use your refrigerant recovery machine to carefully add the refrigerant back into the system. Follow the manufacturer’s guidelines to ensure the correct amount of refrigerant is added.
Step 8: Test the System
With the system recharged, start your machinery and turn on the air conditioning. Check for any unusual noises or leaks. If everything seems to be working smoothly, you’re ready to go! Enjoy the refreshing cool air as you tackle the toughest jobs, even in the hottest weather.
Final Thoughts
After reading the above eight detailed steps, do you think it is not that difficult? Replacing an A/C compressor in off-road machinery may seem challenging, especially in hot weather, but with the right tools and steps, it can be done efficiently. By following this guide, you’ll ensure your machinery remains cool and your productivity stays high.
If you are looking for a high-performance A/C compressor or related parts, FridayParts is a good choice. It is a trusted online shop that provides OEM-quality aftermarket parts at lower prices for off-road machinery. Feel free to visit our catalog and get the compatible product you need!
