
Trouble getting that stuck hydraulic cylinder end cap off your excavator or other heavy-duty machinery? You’re in the right spot. If the end cap (also called a gland) becomes seized, corroded, or damaged during past work, it can stop your job dead in its tracks. This guide will show you how to remove a hydraulic cylinder end cap, from basic safety rules to pro tricks for getting even the most stubborn end caps off.
How to Remove Hydraulic Cylinder End Cap Safely?
This works for most cylinders on excavators, dozers, loaders, and other off-road machines. Always keep your machine’s service manual close by for the right torque specs and seal details.
Relieve All Hydraulic Pressure
Never try to loosen or take off an end cap when the cylinder’s still pressurized. Even when the machine’s off, excavator hydraulics can hold thousands of PSI. That trapped energy can turn the end cap into a deadly flying projectile. Follow your machine’s lock-out/tag-out rules to bleed the pressure fully. If you’ve already taken the cylinder off the machine, push and pull the rod back and forth a few times to get rid of any leftover fluid and pressure through the ports.
Secure the Cylinder
The hydraulic cylinders of the excavator are heavy. Attach it to a heavy-duty vise or specialized hydraulic cylinder repair table. You need to use force when disassembling. If the hydraulic cylinder is not stable enough, it is easy to rotate or slide along. Not only is it difficult to operate, but it may also injure people or damage parts. You have plenty of room to operate and sufficient space for the piston rod to move.
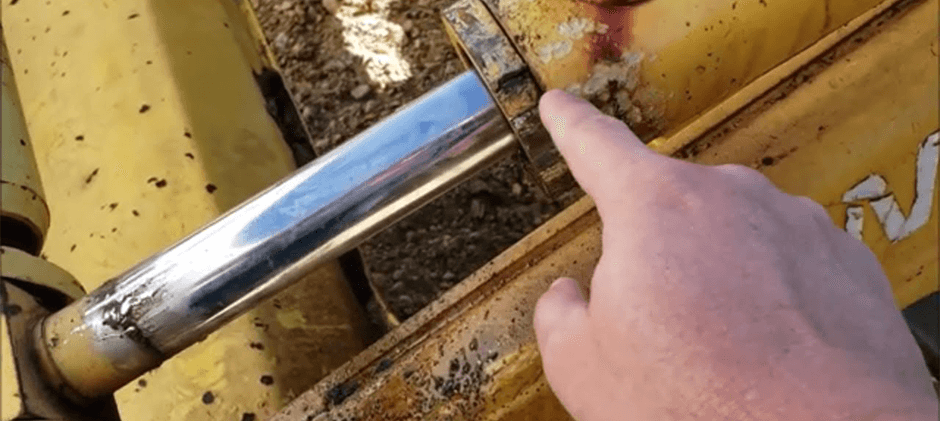
Thoroughly Clean the Exterior
This equipment spends all day covered in dirt and grime. Blast the entire end of the cylinder with a pressure washer, or scrub it down good by hand. Pay extra attention to the area where the end cap meets the barrel. A clean surface lets you spot any snap rings or lock screws you might have missed. It also keeps dirt from getting inside the cylinder while you’re taking it apart. If dirt gets in there, it’ll ruin your brand-new seals as soon as you put everything back together.
Identify the End Cap Type
Take a close look at the cap. Does it have a bunch of holes or notches on the face? Is it held on by a ring of bolts? Or is it just a smooth, threaded piece? Knowing what type of cap you’re dealing with tells you exactly what tools and methods to use. We’ll dive deeper into this in the next section.
Take the Right Tool
There is no time to cut corners. Using a pipe wrench, hammer, or chisel is a surefire way to scratch the cap, score the cylinder barrel, or damage the piston rod. Use a proper gland nut wrench or spanner wrench made for your specific cap. If it’s a bolted cap, go with a good-quality socket and breaker bar.
Apply Slow, Steady Torque
Get the right tool locked on good and tight, then twist it firmly and smoothly counter-clockwise (y’know, “lefty-loosy”). Jerky tugs will make the tool slip and mess things up. If the cap’s super stuck, you can use a longer breaker bar for extra leverage—but take it slow. You don’t wanna snap the tool or crack the cap.
Pull the Cap Off Straight
Once the threads break free, the cap should start unscrewing easily. Keep pulling it off straight and even—don’t rock it back and forth. Rocking will scratch the piston rod’s precision-machined surface, and that’ll cause leaks the second you put the cylinder back to work.
Check Over All the Parts
Once the cap’s off, check the threads on both the cap and cylinder barrel real close—keep an eye out for any galling or damage. Don’t forget to inspect the seal grooves too, for nicks or rust. This is the best time to see if you need a new seal kit, or if any other parts are too worn out to put back in use.
Types of Hydraulic Cylinder End Caps & Matching Tools
Using the right tool is half the battle. Off-road machinery primarily uses two types of end caps, each requiring a specific approach.
| End Cap Type | Description | Best Tool to Use |
|---|---|---|
| Threaded Gland/Cap | This is the most common type on excavators. It screws directly into the cylinder barrel and has pinholes or slots on its face. | Adjustable Gland Nut Wrench or Pin Spanner Wrench |
| Bolted Cap | This style features a flange that is secured to the cylinder barrel with a series of high-tensile bolts. | Heavy-Duty Socket, Breaker Bar & Torque Wrench |
A gland nut wrench has adjustable pins that lock tightly into the holes or slots on the cap’s face. That lets you crank hard on the cap evenly, so it’s way less likely to slip or get damaged.
If you try using a pipe wrench instead, you’ll crush or scratch the cap’s outer edge. And jamming a hammer and a drift into those pinholes? Total recipe for cracking the cap wide open.
Also, some cylinders have a hidden wire retaining ring tucked in a groove inside the barrel. You gotta find that ring and fish it out with picks before you can yank the gland out. If you think there’s a hidden retainer in there, always check your service manual first.
How to Deal with Corrosion or Rusted Components?
Rust is the arch-nemesis of any mechanic working on heavy equipment. If corrosion has seized your end cap, patience and the right technique are key.
First, liberally apply a high-quality penetrating oil to the threads where the cap meets the barrel. Don’t be shy with it; you want the oil to wick deep into the threads. Let it sit for several hours, or even overnight for severely rusted parts. Reapply every so often.
If penetrating oil alone isn’t enough, controlled heat can be your best friend. The goal is to expand the outer cylinder barrel slightly, breaking its bond with the threaded cap. Important: Apply heat to the cylinder barrel, not the end cap itself. Use a propane or oxy-acetylene torch with a rosebud tip to heat the barrel evenly in a band just behind the cap.
Heating the cap will cause it to expand, making it even tighter. Heating the barrel expands it away from the cap’s threads. Be mindful not to overheat the area, as this can damage the internal seals and compromise the metal’s temper. Keep a fire extinguisher nearby and work in a well-ventilated area. Once heated, immediately try to turn the cap with your gland nut wrench. The combination of heat and penetrating oil is often enough to break even the most stubborn rust.
For surface rust, a wire brush can be used to clean the area, but if the corrosion has created deep pitting on the cap or barrel, you should strongly consider replacing the damaged components. A compromised cap can fail under pressure.
Tips for a Smooth Removal Process
Tried soaking it with penetrating oil, but the cap still won’t move an inch? Hold off on the extreme stuff—here are some pro tricks to try first.
- Percussive Shock: Sometimes rust’s grip just needs a good jolt. Grab a heavy dead-blow hammer, or a brass drift and a sledgehammer. Give the outer edge of the end cap sharp, firm whacks, working your way all the way around it. That vibration can break up the rust stuck in the threads. After a few rounds of hitting, give your wrench another go.
- Combine Forces: More often than not, mixing a few methods works best. Slather on some penetrating oil and let it soak in. Then carefully heat up the cylinder barrel. Right after that, use your gland nut wrench with a long breaker bar for extra leverage. Having a second person help is a game-changer—one to hold the wrench steady, the other to crank on it.
- The Last Resort: If the cap is totally seized and you’ve already messed up the spots where tools lock on, some mechanics will weld a thick steel bar straight to the cap’s face. That makes a huge, custom lever you can pull on. But this is high-risk, destructive stuff—only let a pro welder do it. It’ll ruin the end cap (you’ll have to replace it), but it might save the way more expensive cylinder barrel. This is your absolute last shot before cutting the whole cylinder apart.
What if the End Cap Won’t Come Off?
You’ve tried every trick, but that end cap still won’t budge an inch. Stop right there before you wreck something—take a minute to reassess the situation.
First, make 100% sure all hydraulic pressure is fully released. Even a tiny bit of leftover pressure can lock the cap tight as a rock. Then, give the cylinder another thorough check—you might’ve missed a hidden set screw or snap ring somewhere.
If you’re certain nothing is holding it back, the problem is almost always bad corrosion or threads that got galled (smeared) from a lousy install last time. Cranking harder at this point is just asking for trouble. You could crack the end cap, snap your tool, or ruin the cylinder’s threads for good.
Now’s the time to weigh your options. Forcing it any further can turn a quick fix into a full-on replacement job. Sometimes the cheapest, smartest move is to accept that the end cap’s toast—either go for the aggressive welding trick we talked about earlier, or take it to a pro hydraulic repair shop.
Final Thoughts
Taking off a hydraulic cylinder end cap is all about safety, patience, and the right tools. First things first—bleed all the hydraulic pressure and clamp the cylinder down tight and steady. Figure out what type of end cap you’re dealing with, grab the proper wrench, and you’ll get this job done like a pro. When it’s time to put everything back together, or if some parts are too far gone to fix, FridayParts has got you covered. We stock a huge range of top-quality, budget-friendly hydraulic cylinder and seal kits that fit most major heavy-duty equipment brands. Head to FridayParts now to get all the tools and parts you need!