
If your mini excavator, during operation, suddenly experiences the dislodgement of its track, please at once cease the undertaking of work. This signifies that your track has already suffered severe impairment and necessitates timely reinstatement onto the undercarriage. Although the reinstallation of the track may appear as a vocation suitable only for professional technicians, it constitutes a facile and approachable task that any operator is capable of learning. This guide shall unveil the enigma of the entire procedure, dissecting it into steps that are simple and practicable, thereby enabling you to restore work safely and expeditiously.
3 Signs Your Excavator Track Back Is Loose
A track rarely comes off without warning. In most cases, it’s the result of the track becoming too loose. Recognizing the signs of lost tension is the key to preventing a thrown track in the first place. Here are the telltale signs you need to watch for during your daily walk-arounds.
1. Excessive Track Sag
This is the most obvious sign. The track should not droop excessively between the rollers. To check it properly:
- Use the boom and blade to lift one side of the machine just off the ground.
- Measure the distance between the bottom of the track frame and the top of the track at the lowest point (usually near the middle roller).
- Check your machine’s operator manual, but a general rule of thumb is about 1 to 1.5 inches of sag. If it’s significantly more than that, your track is too loose.
2. Sprocket Slipping or “Jumping”
The sprocket is the gear that drives the track. When the track becomes loosened, the sprocket teeth, during the rotation process, shall slip out from the bushing of the track, thereby producing a tremendous clanging noise or a sensation of jolting while traveling. This not only indicates that the track is loosened, but also results in the rapid wearing of both the sprocket teeth and the track itself.
3. Visible Damage and Wear
Physical damage is a direct contributor to a track losing its integrity. Keep an eye out for:
- Cracking: Deep cracks in the rubber, especially around the lugs, weaken the track structure.
- Missing Lugs: The internal lugs guide the track along the rollers. If they break off, the track is much more likely to walk off the undercarriage.
- Exposed Steel Cords: If you can see the steel cables inside the rubber, the track is severely compromised and at high risk of snapping or de-tracking.
To discern these signs is your foremost line of defense. Yet, even if you have exerted utmost effort, should the track still depart from its place, you must make yourself ready. The initial step is to be prepared with the fitting implements.
Prepare Tools and Equipment
Having the right tools ready will turn this job from a frustrating struggle into a methodical process. You don’t need a massive workshop, just a few key items.
Safety Gear (Non-Negotiable):
- Heavy-Duty Gloves: To protect your hands from grease and pinch points.
- Safety Glasses: Grease can spray out under pressure.
Essential Tools:
- Wrench: You’ll need the correct size socket or wrench to open the grease valve on the track adjuster.
- Long, Sturdy Pry Bar: This is your most important tool for leveraging the heavy excavator track back into place. A 4-5 foot bar is ideal.
- Grease Gun: Filled with the appropriate chassis grease to re-tension the track.
Helpful Items:
- A Friend: A mini excavator track can weigh over 100 lbs. A second person makes handling it much safer and easier.
- A Block of Wood: Useful for propping the track or for extra leverage.
- Rags or Paper Towels: For cleaning the grease fitting before re-tensioning.
How to Put Tracks Back on a Mini Excavator?
With your tools gathered and the area secured, it’s time to get to work. Follow these steps carefully.
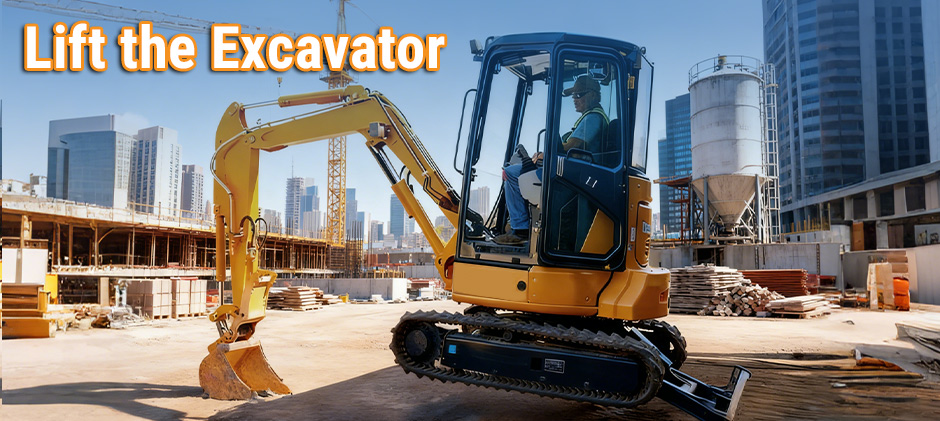
Step 1: Lift the Excavator and Ensure Safety
You must lift the affected side of the undercarriage off the ground to work on it.
- Position the Machine: If possible, “walk” the excavator to a flat, stable piece of ground.
- Lift It: Use the boom and blade to lift the machine. Push the dozer blade down to lift the front, then use the boom and bucket to push down on the ground to lift the rest of the machine. The track should be completely clear of the ground.
- CRITICAL SAFETY STEP: Once the machine is lifted, engage the hydraulic safety lever. This locks the controls and prevents the machine from accidentally moving or dropping if a lever is bumped. Never work on the undercarriage without doing this.
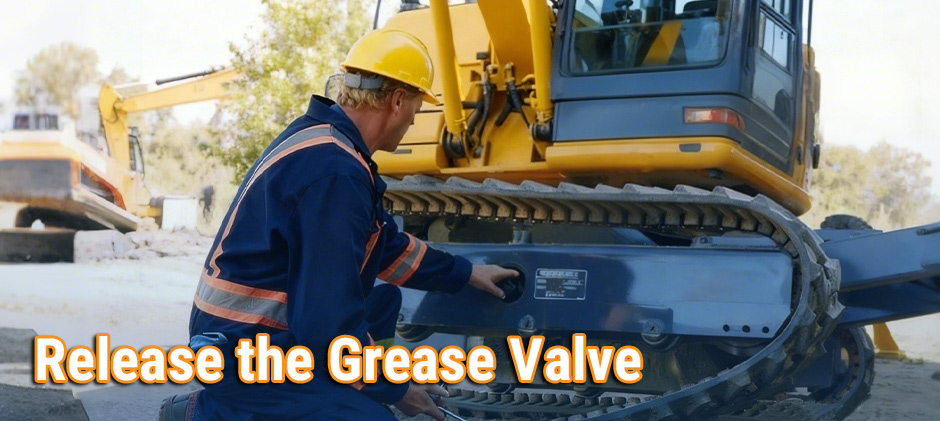
Step 2: Take Off the Track (or Fully Loosen It)
To get the excavator track back on, you first need to release all the tension.
- Locate the Grease Valve: Look on the side of the track frame for a small access panel or a hole. Inside, you will find a grease fitting (zerk) and a larger valve nut. This is the track adjuster.
- Release the Grease Valve: Use your wrench or socket to slowly loosen the main valve nut (NOT the smaller grease fitting). Turn it counter-clockwise. Grease will begin to seep out under pressure.
- Retract the Idler: As the grease escapes, the front idler wheel will retract back into the track frame, releasing all tension on the track. If the idler is stuck due to packed dirt, you may need to stand on the track and bounce it a few times to help it along. The track should now be completely slack.
- Walk the Track Off: If the track isn’t completely off already, use your pry bar to lever the edge of the track off the front idler. Have your helper pull the track away from the frame as you do this.
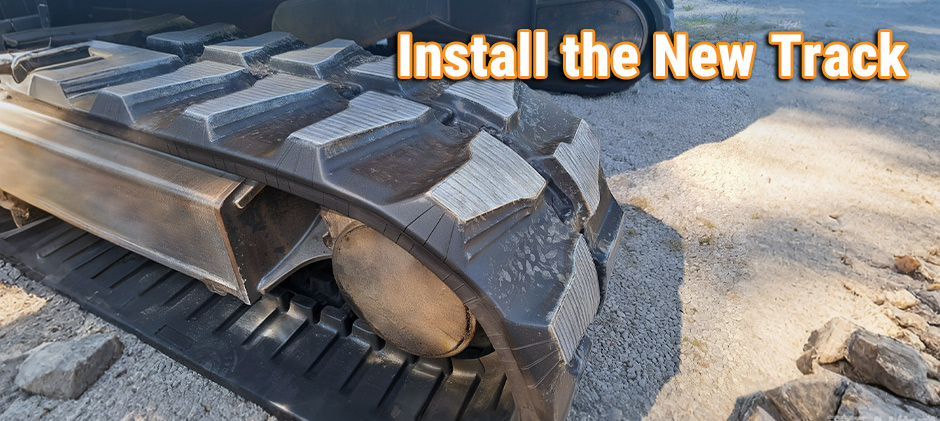
Step 3: Install the New Track (or Reinstall the Old One)
This is where technique and leverage are key.
- Check Track Direction: If you are installing a new rubber track, look for a “V” pattern on the treads. For proper performance, the track should be installed so the point of the “V” moves forward when traveling forward.
- Drape the Track: First, with the help of your partner, lift and drape the track over the sprocket at the rear of the undercarriage. Make sure the teeth of the sprocket engage correctly with the bushings of the heavy rubber chain.
- Align with the Rollers: Guide the track so it is sitting on top of the track roller set along the top of the frame.
- Lever onto the Idler: This is the hardest part.
- Position the track so it is partially started on the front idler.
- Wedge your long pry bar between the front idler and the inside of the track.
- As you and your helper push the track towards the machine, use the pry bar to lever the track up and over the edge of the idler.
- It may be helpful to have your helper slowly and carefully rotate the track by hand (if possible) while you lever it on.
Step 4: Re-Tension the Track
- Clean and Tighten the Valve: Wipe any dirt and old grease from the grease valve and fitting. Tighten the valve nut securely.
- Pump in Grease: Attach your grease gun to the smaller grease fitting. Begin pumping grease into the adjuster. You will see the idler move forward and the track begin to tighten.
- Set the Correct Sag: Continue pumping until you achieve the correct track sag (around 1-1.5 inches, as measured in the first section). Proper tension is vital for the health of all your undercarriage parts.
- Final Check: Lower the machine, start it, and drive it forward and backward a few feet to allow the track to settle. Lift the track side again and re-check the tension. Adjust if necessary.
How Often Do Mini Excavators Lose Tracks?
How often this frustrating event occurs depends almost entirely on a combination of environment, operation, and maintenance. A machine will throw a track more often under high-stress conditions.
| High-Risk Factors (More Frequent) | Low-Risk Factors (Less Frequent) |
|---|---|
| Operating on rocky, uneven terrain. | Working on soft soil or flat ground. |
| Constant sharp turns and counter-rotating. | Making wide, gradual turns. |
| High-speed travel across the job site. | Using low-speed travel and minimizing movement. |
| Packed mud and debris in the undercarriage. | Daily cleaning of the undercarriage. |
| Neglecting to check track tension regularly. | Performing daily tension checks. |
While you can’t always control the terrain, you absolutely can control your maintenance schedule and operating habits. Regular cleaning and daily tension checks are the two most effective things you can do to prevent a thrown track.
Keep Your Machine Moving for Less
Learning how to reinstall tracks is a valuable skill that can save you time and money on repair visits. It can turn a major breakdown into a manageable repair. When preventative maintenance isn’t enough, and components like excavator back track, roller, or sprocket wear out, FridayParts offers a wide selection of high-quality, affordable maintenance parts across a wide range of tractor brands, ensuring your machine runs reliably without breaking your budget.