
The tile is beautiful and tidy, but when you need to hang a mirror, a shelf, or put the sink back on the wall, it becomes tricky and terrifying. How to drill into tile without cracking it?
It’s not being scared over nothing. A wrong move can lead to a failed installation, and that’s where the guide comes in. This guide will teach you how to choose the right tools and provide a step-by-step method, so you can easily follow.
Pre-Work You Need to Know
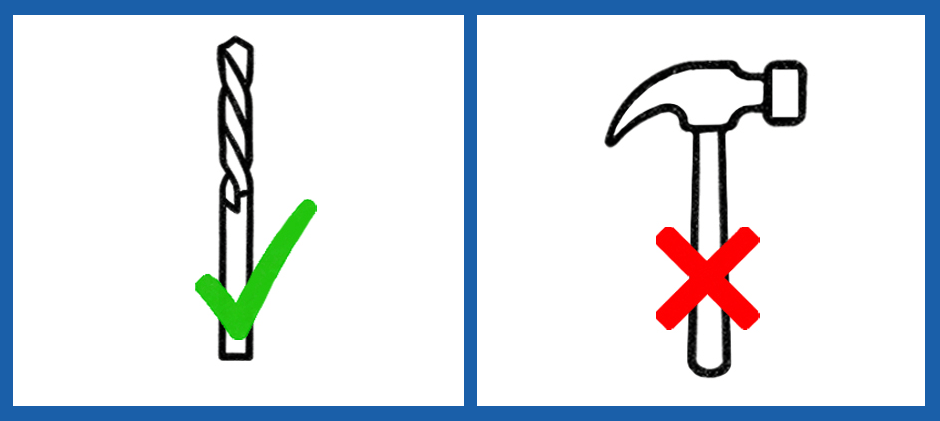
The secret to drilling tile isn’t brute force; it’s using the right tool for the job. Standard drill bits are useless here. Tile is so hard that it needs to be slowly ground away, not cut. Using the wrong bit is the #1 reason tiles crack.
How to Choose the Drill Bit
- For Ceramic Tile: Use a spear-shaped drill bit. These are affordable and work great on softer, common wall tiles. For glazed or denser ceramic tiles, consider starting directly with a small diamond-tipped bit for smoother results.
- For Porcelain, Glass, or Stone Tile: You must use a diamond-tipped drill bit. Porcelain is a nightmare to drill. It’s incredibly dense and hard. A diamond bit grinds through it smoothly, while anything else will just spin, overheat, and fail.

Tools You Need
- A variable-speed drill (Note: An impact driver is not recommended for this task due to its hammering action. See our guide on Impact Driver vs Drill to understand why.)
- Your chosen drill bit (spear-tipped or diamond-tipped)
- A quality stud finder
- Masking tape and a marker
- A spray bottle filled with water
- Safety glasses and gloves
The Step-by-Step Guide to Drilling into Tile
Follow these steps carefully. Don’t rush, and you’ll avoid cracks and frustration.
1: Find Your Anchor Point
A stud finder is the most reliable and convenient way to locate studs.
How to use it: Turn on the stud finder and slide it horizontally across the wall. Mark the wall with a pencil where it first beeps (the edge of the stud) and where it stops beeping (the other edge). The center point between these two marks is where you should drill. To be extra sure, repeat this process at a slightly different height to confirm the stud is vertical.
Tip: If no stud is available where you need to drill, use a hollow-wall anchor (like a toggle bolt) to provide the necessary support.
2: Mark and Tape Your Spot
Once you’ve located your stud, mark the precise spot you need to drill. Then, place a small “X” of masking tape over the mark. The tape does two very important things: it gives the drill bit a grippy surface so it doesn’t slip and scratch your tile, and it helps prevent chipping around the edge of the hole.
3: Create a Starting Point
To prevent the bit from “walking,” you need a tiny pilot divot. You can do this in two ways:
- Method A: Press the tip of your drill bit onto your mark and run the drill at a very slow speed for just a second.
- Method B: Start with the drill held at a 45-degree angle. Run it slowly to score a small crescent shape. This is risky, as the edge of the bit can easily chip the glaze. Once a small groove is established, slowly and carefully bring the drill perpendicular to the wall to continue. Only attempt this on thick, well-supported tiles and never on thin or glass tiles.
4: Drill Slow and Keep It Cool
This is the most critical part. Heat is the enemy of tile and drill bits.
Set your drill to its slowest speed and begin drilling with steady, light pressure. As you drill, periodically squirt water from your spray bottle directly into the hole. For harder or larger holes, a continuous water feed works even better than occasional spraying. This keeps everything cool, reduces dust, and prevents stress cracks.
5: Ease Through the Back of the Tile
Continue drilling slowly and steadily. You will eventually feel a sudden decrease in resistance. This is the moment to reduce your pressure to almost zero, letting the bit gently pass through the final layer of tile. This prevents the drill from lurching forward and ensures a clean exit hole.
6: Switch Bits for the Wall Behind
The material behind your tile (drywall, wood stud, or concrete) requires a different approach.
- For drywall or a wood stud, switch to a standard drill bit to finish the hole.
- For concrete or brick, you’ll need to switch to a masonry bit. For a detailed walkthrough on this part of the process, check out our complete guide on How to Drill into Concrete. Once you’ve switched to a masonry bit, you can turn on your drill’s hammer function if needed.
If your tile is directly on concrete, drill completely through the tile first with the diamond bit (hammer function OFF). Then, remove the diamond bit from the drill, switch to a masonry bit, and continue drilling into the concrete. Now you can safely turn on your drill’s hammer function.
Practical Drilling Tips
If you have any leftover tiles, this is a golden opportunity. Before you drill into your wall, take a spare tile, place it on a piece of scrap wood, and practice. This will let you get a feel for the pressure needed and build your confidence. One practice run can make all the difference.
- The Golden Rule: Turn OFF the Hammer Function: The hammering vibration is designed for concrete and will shatter your tile. Always make sure your drill is set to the “drill-only” mode when drilling through the tile itself.
- Check for Hollow Spots: Gently tap the tile with your knuckle. If it sounds hollow, it means there’s no adhesive behind that spot, and the tile is much more likely to crack under pressure. If possible, choose a different location that sounds solid.
- Let the Drill Do the Work: Don’t force the drill. Apply just enough firm, consistent pressure to keep the bit grinding. After you’re done, especially after using water, it’s a good idea to maintain your tools. Learn the best methods in our guide on How to Clean Your Dirty Power Tools.
- Drilling Porcelain: For very hard porcelain, some pros prefer to pre-drill. Start with a smaller diameter diamond bit to create a pilot hole, then switch to the final size you need.
Stay Perpendicular: Keep the drill at a perfect 90-degree angle to the wall. Tilting the drill can damage the tile or widen the hole unevenly.
Choosing the Right Bit and Cooling Method
| Tile Type | Drill Bit | Cooling | Key Technique |
|---|---|---|---|
| Ceramic (soft) | Spear-tip / Diamond | Light spray | Slow speed, light pressure |
| Porcelain / Granite | Diamond bit (pilot first) | Continuous water | Slow speed, firm pressure |
| Glass / Marble / Slate | Diamond bit | Continuous water | Very slow speed, very light pressure |
| Wall Behind: Drywall/Wood | Standard bit | None | N/A |
| Wall Behind: Concrete/Brick | Masonry bit | Water optional | Hammer function ON |
Frequently Asked Questions
My drill is just spinning and not going anywhere. What’s wrong?
This almost always means you are using the wrong type of drill bit (e.g., a spear-tipped bit on hard porcelain), or your bit is completely worn out. A fresh diamond bit is the solution.
What if I can’t find a stud where I need to hang something?
If there’s no stud, you’ll need to use a proper wall anchor designed for hollow walls. After drilling through the tile, use a standard bit to make the hole in the drywall behind it large enough for the anchor (like a toggle bolt or screw-in anchor). The anchor will provide the support you need.
I accidentally cracked the tile! Can I fix it?
For small hairline cracks, you can use a color-matched epoxy or a tile repair kit to hide the damage. If the crack is large, you may unfortunately need to replace the tile.
Final Words
This guide will clear your questions and help you take a good command of drilling into tile quickly and excellently. Otherwise, you need to pick up a reliable tool and maintain it properly. This guide can also offer you a source.
Visit FridayParts today to select various power & hand tools, including drill parts, impact driver parts & accessories, and more. With professional techniques and reliable tools, I bet you can finish this job easily. Enjoy your tidy tile comfortably!