
A dead Lawn mower battery can stop a workday fast—especially when a zero-turn or riding mower is part of your routine for property, park, or site maintenance. This guide shows how to charge your Lawn mower battery safely, how long charging usually takes, and how to pick a charger that fits your battery voltage, battery type, and jobsite reality—so you can reduce no-start calls and avoid damaging the battery or electrical system.
Key Takeaways
- Most riding mowers and lawn tractors use a 12V starting battery; some older units may use 6V, and some electric mowers use lithium packs—voltage must match.
- The safest approach is a low-amp charge and a charger with overcharge protection and automatic shut-off/maintenance mode.
- Connect the clamps red to positive first, then black to negative (or chassis ground); disconnect black first, then red.
- Charging time depends on battery capacity (Ah), the amount discharged, and the charger’s amps. A quick estimate is possible, but the charger indicator is still the best “done” signal.
- If the battery won’t charge, look for terminal corrosion, loose cables, a blown fuse/charging-system issues, or a battery that’s simply at the end of its life.
When To Charge Your Mower’s Battery
During busy months, the mower’s charging system often keeps a healthy starting battery topped up. The problem shows up when machines sit, short-run, or work in conditions that increase electrical load.
Charge your lawn mower battery at these times:
1. Before the first start of the season
A battery can self-discharge while the mower is parked. Starting the season with a full charge reduces hard starts and starter wear.
2. Before long storage/downtime
If the mower will sit for weeks, charging first (and then maintaining charge) helps prevent deep discharge.
3. When you get slow cranking, clicking, or no-start
If the starter solenoid clicks but the engine won’t turn, a low battery is a common cause (not the only one).
4. After electrical work or accessory installs
Replacing solenoids, starter motors, or adding accessories can change the load and expose weak batteries.
A useful rule: you typically don’t need to charge routinely when the mower is running and charging normally. You charge when starting reliability or storage planning demands it.
Transition: Once you know when to charge, the next step is doing it in a way that avoids sparks, overheating, and accidental overcharge.
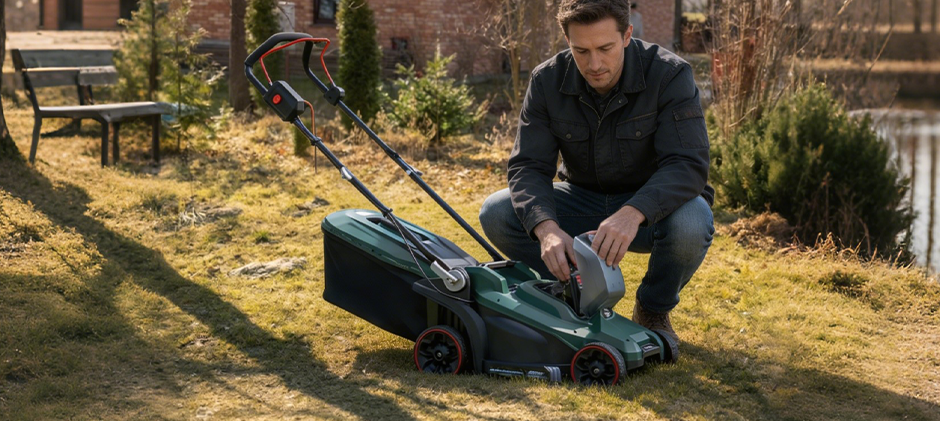
How to Charge a Lawn Mower Battery?
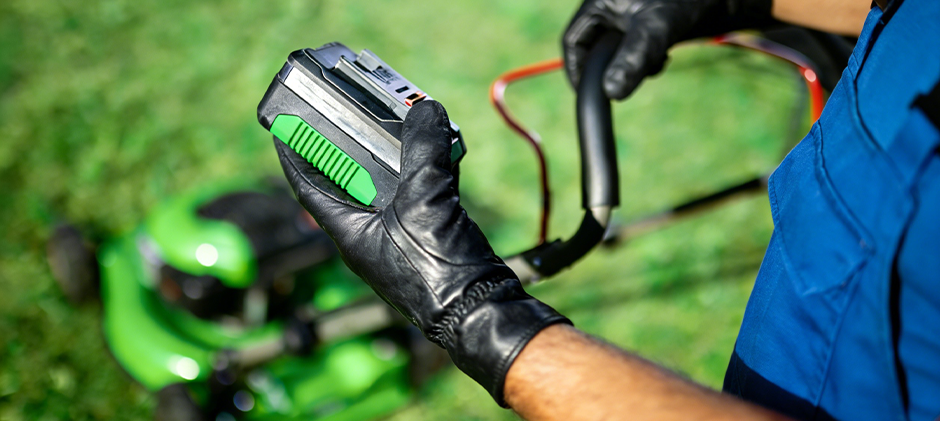
This procedure applies to most ride-on mowers, lawn tractors, and many zero-turn mowers that use a 6V or 12V lead-acid style starting battery (flooded or AGM). If your mower uses a removable lithium pack, use the pack’s dedicated charger and follow the pack instructions.
Tools and prep
- Safety glasses + gloves
- A charger matched to battery voltage and battery type
- Wire brush (or terminal cleaning tool)
- Baking soda + water (for corrosion cleanup), rag
- Optional: multimeter (helpful for quick diagnosis)
Step-by-step: safe charging workflow
1. Park and secure the mower
- Flat ground, parking brake set, key off.
- Let the engine cool.
- Keep the area well-ventilated and away from flames/sparks.
2. Access and inspect the battery
Common locations: under seat, under hood, side tray (varies by model).
Look for:
- Cracked case, bulging case, leaks
- Melted terminals, damaged cables
- Heavy corrosion (white/blue powder)
3. If the case is damaged or leaking, do not charge—replace the battery and correct the root cause.
4. Clean terminals if needed
- Disconnect the mower’s negative cable if you need better access.
- Neutralize corrosion with a small amount of baking soda/water, then dry.
- A clean connection matters because corrosion can block charging current.
5. Make sure the charger is unplugged before connecting
This reduces spark risk during clamp contact.
6. Connect the clamps in the correct order
- Red clamp → Positive (+) terminal first
- Black clamp → Negative (–) terminal second
- Optional safer method: connect the black clamp to an unpainted chassis ground away from the battery to reduce spark risk near the battery.
7. Set charger voltage and battery type
- Confirm the charger is set to 12V (or 6V if that’s your battery).
- If the charger has battery-type modes, pick the correct one (flooded/AGM/lithium).
8. Plug in the charger and start charging
- Prefer a low-amp or “maintenance/trickle” mode unless you have a reason to charge faster and the charger supports it safely.
- Monitor early on: the battery should not get unusually hot.
9. Finish and disconnect safely
- Turn the charger off and unplug it first.
- Remove the black clamp first, then the red clamp.
- Re-secure covers/seat, confirm cables are tight.
If the battery is “too dead” for a smart charger to detect
Some automatic chargers won’t start if the voltage is extremely low. Before forcing anything:
- Re-check clamp contact and terminal cleanliness.
- Try a different low-amp charger that can begin at a very low voltage.
- If it still won’t charge, the battery may be sulfated or internally damaged.
How Long to Charge a Lawn Mower Battery?
There’s no single number because charge time depends on three practical variables:
- Battery capacity (amp-hours, Ah)
- Depth of discharge (how “dead” it is)
- Charger output (amps) and charge profile (smart vs manual)
Quick charge-time table
| Charger type/setting | Typical output | Best use case | Typical time range |
|---|---|---|---|
| Trickle/maintainer | 1–2A | Storage maintenance, very safe charging | 8–24+ hours |
| Low-amp standard | 4–10A | Faster turnaround when you can monitor | ~1–6 hours |
| High-amp “car charger.” | 10A+ | Use only if it has proper control and settings | Risky with small batteries |
What to trust most: the charger’s status light/display on an automatic unit. Many modern chargers stop or switch to a maintenance mode to help prevent overcharging.
Finding The Correct Battery Charger
Picking the right charger is where most damage happens (wrong voltage, too much current, no safety features). For turf and off-road service equipment, the best charger is the one that matches your battery and can survive your environment.
1) Voltage compatibility
- Many mowers use 12V batteries.
- Some older equipment may use 6V.
- Some electric mowers use lithium packs with dedicated chargers.
Using the wrong voltage can damage the battery and electrical system—so verify the battery label first.
2) Amperage output
Higher amps charge faster, but increase heat risk on smaller batteries. For most mower starting batteries, low-amp charging is easier on the battery.
A practical approach:
- Use 1–2A for storage or deeply discharged batteries.
- Use 4–10A when you need the mower back sooner and can monitor progress.
3) Safety features that matter on real equipment
Look for:
- Overcharge protection and automatic shut-off
- Reverse connection protection (helps prevent damage if clamps are swapped)
- Short-circuit protection
- Maintenance/float mode (useful for storage)
4) Durability
Charging often happens in barns, sheds, trailers, or maintenance bays. A rugged charger and protected cables reduce downtime from charger failures.
Maintenance Tips for Lawn Mower Batteries
Charging safely is only part of the story. Battery failures on working equipment often come from corrosion, vibration, long storage, and repeated deep discharge.
1) Keep terminals clean and tight
- Clean corrosion before it becomes a high-resistance problem.
- Tighten connections so vibration doesn’t loosen the clamps.
- After cleaning, consider terminal protection spray (light use—don’t insulate the contact area).
2) Avoid deep discharge during storage
If the mower sits:
- Charge the battery fully.
- Use a maintainer/float mode if available.
- Store in a cool, dry place when practical.
Deep discharge is a common cause of capacity loss in lead-acid batteries.
3) Watch for charging-system problems on the mower
If the battery repeatedly dies even after a correct charge, the mower may not be recharging it during operation. Common causes include:
- Loose or corroded charge wires
- Blown fuse in the charging circuit
- Faulty regulator/rectifier (model-dependent)
- Stator/alternator output problems
A multimeter check during operation (following safe procedures) can confirm whether the charging voltage rises appropriately.
4) Don’t ignore “slow cranking” patterns
Slow cranking can mean:
- Weak battery
- Poor cable/ground connection
- Starter motor wear
- Solenoid/contact issues
Charging the battery is step one, but if symptoms return fast, it’s time to inspect the rest of the starting circuit.
5) Replace before failure in peak season
For equipment that must start daily, plan replacement around:
- Age and performance trend (more frequent charging, weaker starts)
- Visible damage or repeated inability to hold a charge
- Corrosion damage to terminals/cables
Second CTA placement (late, gentle): keeping the right spares reduces downtime, and pairing a reliable charger with the right service parts is usually cheaper than losing a day to a no-start. If you’re stocking up for the season, revisit lawn mower battery charger and lawn mower parts, and keep a fleet-ready battery charger option for other machines you support.
Conclusion
Safe charging comes down to matching voltage, using a low-amp strategy when possible, and relying on a charger with overcharge protection and shut-off. Clean terminals and smart storage habits prevent most repeat failures. When it’s time to replace chargers or service items, FridayParts supports you as an aftermarket parts supplier with high-quality products at affordable prices, a vast inventory, and wide compatibility across many heavy equipment brands.